Installation & Maintenance
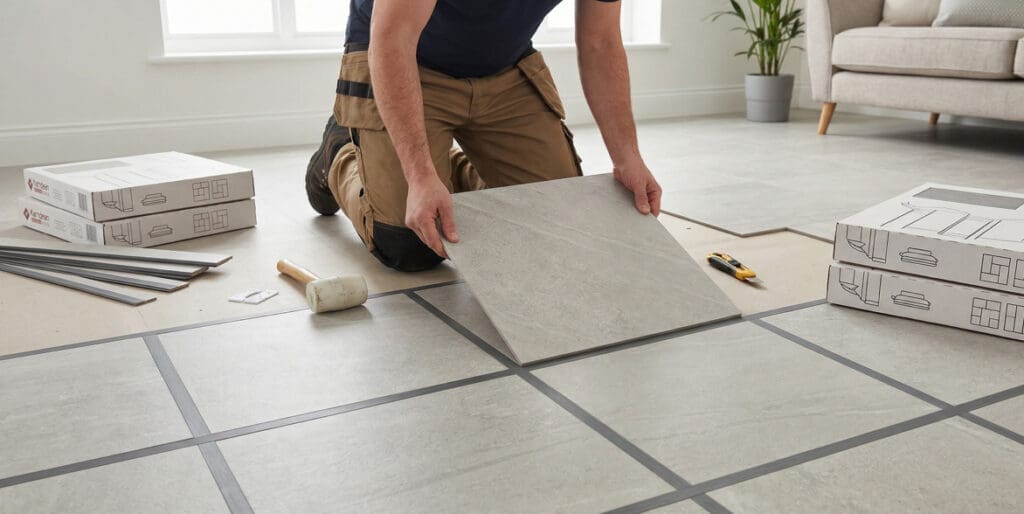
Karndean Flooring Fitters Guide to Installing a Straight Tile
Mar
Key Takeaways
- This guide covers the professional installation of Karndean straight-laid tiles and planks, from finding the room centre to setting out and fitting.
- Accurate setting-out is critical: find the centre lines, check they cross at a true right angle and adjust so border tiles are balanced and not too narrow.
- Karndean dryback floors need a smooth, dry, fully prepared subfloor; a water-based screed gives a better base than latex.
- All Karndean ranges, including Knight Tile, Van Gogh and Art Select, are suitable for underfloor heating.
This guide is written by Grosvenor Flooring, an approved Karndean retail partner based in Altrincham, Cheshire. We provide specialist Karndean flooring installation covering Manchester, Cheshire, South Manchester and the wider North West – including Sale, Hale, Timperley, Bowdon, Knutsford, Wilmslow and Warrington. Whether you are a professional fitter setting out herringbone for the first time or a homeowner who wants to understand what a proper installation involves, this guide covers the setting-out process that underpins every good herringbone and parquet LVT floor.
Every Karndean range we stock – from Knight Tile and Van Gogh through to Art Select – is on display in our 24/7 Smart Showroom at 82 Stamford New Road, Altrincham, WA14 1BS. Visit any time, day or night to see herringbone and parquet layouts in full-size room settings before you commit.
The setting-out process is the same regardless of tile or plank size. Getting the centre line right is everything – a herringbone pattern that drifts even a few millimetres off-centre becomes visibly unbalanced as it approaches the walls. Take your time here and the rest of the installation follows naturally.
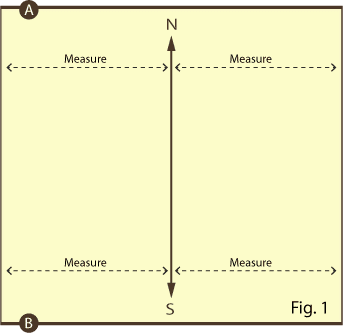
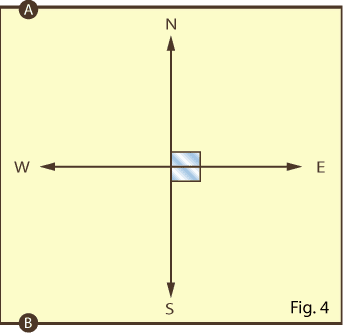
Step 1: Find the centre of the room by measuring from wall to wall along the longest axis (north to south) and marking a centre line – call this line A – B. Snap a chalk line along it.
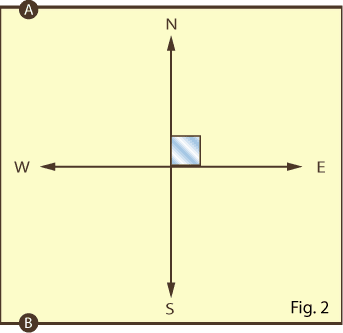
Step 2: Measure from line A – B to find the centre point of the room along the shorter axis (east to west). Using a tile or plank as a square, draw a perpendicular line through this point. This second line should cross A – B at exactly 90 degrees – use a large set square or the 3-4-5 triangle method to confirm it is true. If the room is not perfectly square (most are not), this step reveals the discrepancy so you can correct it before any adhesive goes down.
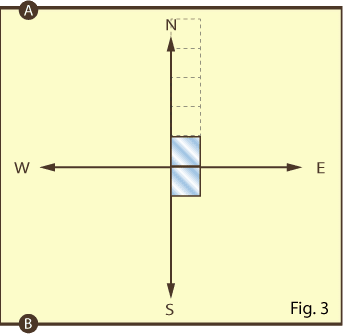
Step 3: From the centre line, place a tile or plank on each side and continue measuring multiples of its width along the line towards the walls.
Step 4: Place the last full tile or plank and measure the remaining gap to the wall. For a clean finish, this border cut should be no narrower than 50mm. If it falls below that, shift the centre tile so it straddles line A – B equally (for example, 150mm on each side). This increases the border cut at both walls and produces a more balanced, symmetrical result. Repeat this check along the east – west line if needed.
This process works for every room size and every herringbone, parquet, or geometric pattern – whether you are fitting Karndean Art Select in a large open-plan kitchen, Van Gogh planks in a hallway, or pattern tile LVT in a living room. The same principles apply equally to other herringbone LVT brands including Amtico Signature, Nordikka Tromso Herringbone and Project Floors Herringbone.
Professional Tips for Fitting Karndean and Herringbone LVT
Acclimatisation: Allow all Karndean products to acclimatise in the room where they will be fitted for a minimum of 24 – 48 hours before installation. Store them flat, not on edge, at a consistent room temperature of at least 18C.
Subfloor preparation: Always prime the subfloor before applying screed. A properly primed surface ensures the screed bonds correctly and prevents adhesive failure later. Water-based screed is far superior to latex – it provides a smoother, more stable base and is easier to work with.
Geometric and bordered designs: For herringbone, parquet and other geometric patterns, fit the field first and the border second. This ensures the pattern is centred and symmetrical before the border frames it. For plain wood plank installations with a border but no geometric pattern, reverse the order – fit the border first, then fill the field.
Underfloor heating: Use a high-temperature adhesive when fitting over underfloor heating or in rooms subject to heat gain, such as conservatories and south-facing extensions. Standard adhesive can soften under sustained heat, leading to tile movement. All Karndean ranges – including Knight Tile, Van Gogh and Art Select – are rated for use with underfloor heating systems.
Cutting: Score and snap is the cleanest method for cutting Karndean and most glue-down LVT. Use a sharp blade, score firmly along a straight edge and snap cleanly. For border cuts and expansion joints, cut into waste material to create a compression joint that allows for natural movement without visible gaps.
Maintenance: Always use Karndean’s own cleaning products to maintain a Karndean floor. Generic household cleaners – particularly those containing bleach, wax, or abrasives – can damage the wear layer or leave a residue that dulls the surface over time. For more information on caring for your Karndean floor or any other LVT flooring, get in touch – we are happy to advise on the right products for your specific floor.
If you are looking for professional Karndean installation in Cheshire or South Manchester, or you want to see herringbone and parquet patterns laid out in a real room setting, visit our 24/7 Smart Showroom in Altrincham. Request a door code online and browse at your own pace – no appointment needed, no sales pressure.